Articulate Storyline is a very intuitive e-learning authoring platform that allows for rapid development with almost no skills necessary. Obviously, if you want to stretch the capabilities of the tool and build more complex experiences such as gamified courses or advanced interactions, you will need to understand and master the use of Variables.
Variables in Storyline are used to collect and store information in the form of text, number or true/false statements. The good thing about Storyline Variables is that you don’t need to know anything about coding in order to use them! All you have to do is use a little bit of logic and think how you can leverage variables to get the results you want.
Adding variables in Storyline is very easy and you can follow this tutorial from Articulate to learn the basics. In this particular blog, I’m not going to show how to add variables but, instead, I’m going to give you examples of how you can use them to increase the engagement level of your courses or create more complex interactive elements.
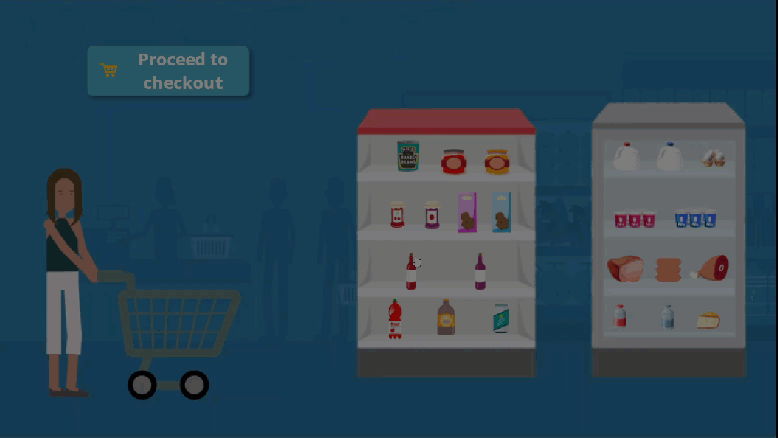
To showcase the many uses of variables, I created a game based on this E-learning Heroes Challenge. The game is simple: you have 20 dollars to spend on groceries. You have to randomly collect items and put them in your cart. Once you proceed to checkout, you will learn if you were able to keep within budget, go overboard or not buy enough items. It’s a guessing game and you will rely on your luck and grocery shopping expertise to ensure you are a savvy shopper.
Let’s take a closer look at how I built this interaction:
1.) I started by building variables for each grocery item to store the true/false value I wanted to carry over to the next slide. Once I had one variable set for each item, I assigned conditions to set the variable to true once the item was dropped on the shopping cart hotspot. By turning these variables on with this specific condition, Storyline will remember only the items that I place in the cart.

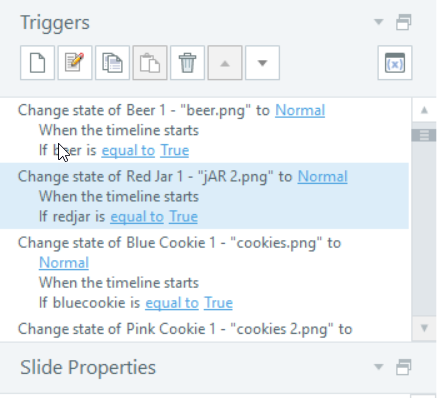
2.) The next slide will have a checkout counter with all the objects initially in a hidden state. To make just the items you dropped on your shopping cart appear on the checkout counter, I included a trigger for each object to change its state from hidden to normal, on the condition that their variable (remember the variables we were setting on the previous slide?) is equal True.
3.) I assigned a price value for each of the items, so you can add them up to your total and compare if you bust your budget or not. For this, I created 2 more variables: totalvalueoforder; itemprice; In addition, each item had also a price variable attached to them, so for instance, for the egg true or false variable, I also created an egg price number variable and gave it a number.

4.) The variable “itemprice” will display the price of each of the items scanned on the Cash Machine by setting variables such as “set itemprice equal to the value of “eggprice” when the user drags shape over hotspot1″
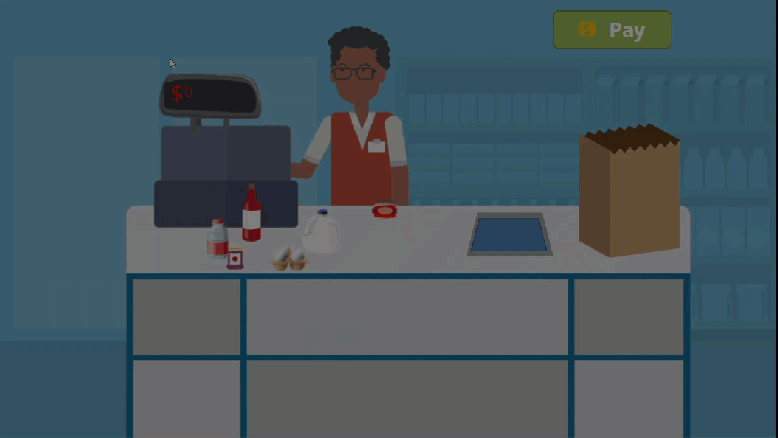
5.) The variable “totalnumberofitems” will add the entire purchase and display to the user at the end and let them know if they passed or failed the challenge.